Homemade Soft Pretzels – Buttery, Chewy, and Tastier Than the Ones from the Mall
Homemade soft pretzels have a special ability to make anyone feel all comfy and cozy right away. And if the pretzels have just popped out of the oven, smelling of that lovely burnt golden crust and topped with salty flakes, it simply means that you’ve made it right! In case you’ve only ever eaten pretzels bought at a mall or even out of a box, you’d better start making your own pretzels now. They are much softer, butterier, chewier,r and just more satisfying in taste than anything that comes pre-made.

I usually choose to bake soft pretzels on my days off when I need something cozy to cook in the house. I think there is no easier thing than shaping the dough into pretzels. However, there were some occasions in which I boiled pretzels for too long because I got distracted sending texts. I ended up with the pretzels tasting of strong baking soda flavor, which totally ruined my impression. From now on, I will use a timer setting exactly 30 seconds as the maximum boiling time.
So today we’ll make these perfectly chewy, golden, and buttery soft pretzels from scratch at home.
What you’ll need:
For the Pretzel Dough:
- 1.5 cups of warm water (360g)
The temperature should be around 110°F/43°C – not hot enough to kill the yeast.
- 1 tablespoon of granulated sugar (12g)
- 1 package of instant or rapid-rise yeast (around 7g)
- 4 cups of all-purpose flour (480g)
- 1 teaspoon of salt (6g)
- 2 tablespoons of butter (28g)
The softened butter gives pretzels a softer taste and buttery flavor.
For the Baking Soda Bath:
- 10 cups of water (2400g)
- 2/3 cups of baking soda (180g)
This is what gives soft pretzels their famous chewy crust and dark color.
For Finishing:
- 1 egg beaten (optional)
- Coarse pretzel salt or flaky sea salt
- Melted butter for finishing (optional)
Activate the Yeast
We should start by warming the mixing bowl with a little hot water. I know it sounds unnecessary, but putting cold water can significantly reduce the yeast activity due to the temperature shock. I figured that out the hard way when a few batches of dough failed to rise because of the low water temperature.
Pour the warm water into the bowl, then add the granulated sugar and yeast and stir it for several minutes. We should wait for about 5 minutes while the yeast dissolves in the water.
When it’s ready, the yeast should become foamy and creamy, developing tiny bubbles and releasing an aroma of freshly risen dough.
If the yeast doesn’t foam after 5-10 minutes, the pack of yeast has become inactive. In such a case, it’s better to discard it and start the process again.
Pro tip: I always measure the temperature of the dough. Estimating it by yourself can result in mistakes that could harm the yeast.
Mix the Dough
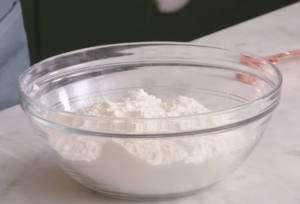
Now, let’s prepare the flour mixture for our soft pretzels. Add all the flour and salt into the bowl, mixing thoroughly.
Next, we should add about half of the flour mixture to the yeast mixture instead of pouring the whole flour in once. Mixing them will help create a thick base dough, which will be easier to stir. At the same time, add the softened butter and continue stirring.
When it looks homogeneous, we need to mount a dough hook onto the mixer and gradually pour in the remaining flour, mixing constantly at a medium speed.
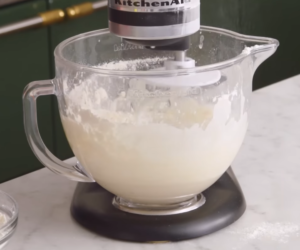
After a few minutes, the dough should become soft and slightly stretchable. When we try to squeeze it, the dough shouldn’t stick to our hands and fingers.
At this stage, it smells amazing! A pleasant smell of yeasts combined with the warm smell of flour and fresh butter.
Knead the Dough Till Homogeneous
Now we transfer the dough to a lightly floured surface and knead it for 4 minutes or so. Our goal is to knead the dough until it stops being sticky and becomes homogeneous.
It will be very stretchy and almost silky to the touch after a few minutes of kneading. Also, we’ll note that the gluten network becomes stronger and more elastic.
When I cooked pretzels for the first time, I overworked the dough and put in too much flour. As a result, it resulted in dense pretzels instead of chewy ones.
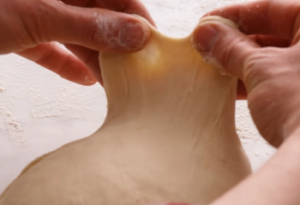
To check whether our dough is ready, we need to take a pinch of it and try the “windowpane” test. We should try stretching this ball till the thinnest layer that doesn’t tear.
Pro Tip: Sometimes sticky dough may make the pretzels softer. Adding more flour immediately doesn’t solve the problem.
Let the Dough Rise
Now we grease the bowl and put it there. Cover it with the towel or plastic wrap and let it rise for 40 minutes.
When it’s done, our pretzel dough should noticeably expand, becoming twice its initial volume. Also, we should poke it slightly with a finger and see how fast the indentation disappears.
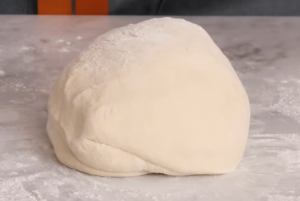
This stage always fills the house with the amazing smell of warm yeasts mixed with dough.
Now preheat the oven to 450°F (230°C). At the same time, boil 10 cups of water in the pot.
Prepare the Baking Soda Bath
Once we bring the water to the boil, we add baking soda to it carefully, stirring slowly and gently.
It’s quite aggressive at the beginning, but stops eventually. The smell becomes alkaline and sharp, yet that’s totally natural.
At this step, our ordinary bread dough turns into a real pretzel. It develops its distinctive taste only after using a baking soda bath.
Shape the Pretzels
We divide the dough into 8 equal portions and roll them into a rope 22-24 inches long.
Before we start rolling the dough, we shape it a little. It will make our ropes more equal to each other.
If the dough shrinks while we roll it out, it means that the gluten is too stiff. It will take a few minutes to let the gluten relax.
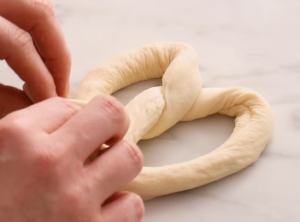
To shape the pretzels, we need to form a big U-shape, twist the dough, and fold the twisted end on the base. If the pretzels won’t stick to themselves, we may add a few drops of water under them.
Long 24-inch ropes will give us big pretzels, whereas shorter ones will become puffier.
Pro tip: Actually, I always measure the rope with a ruler.
Boil the Pretzels in a Baking Soda Bath
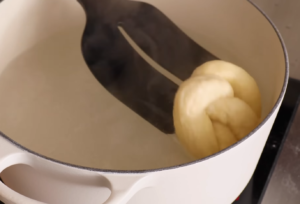
We need to lower the pretzel into the bath with a slotted spoon and boil it for 30 seconds strictly.
Take the boiled pretzel out and place it onto the baking paper-lined tray.
As you might notice, our pretzels should look slightly puffy after boiling.
To make sure that I don’t forget the boiling time, I usually boil each pretzel one by one.
Don’t boil the pretzels for too long; otherwise, they will absorb a strong baking soda flavor.
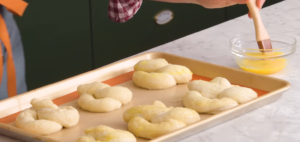
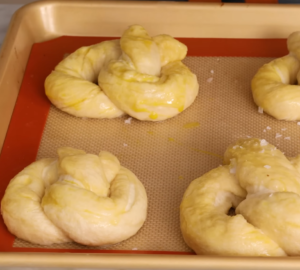
Apply the Egg Wash and the Coarse Salt
Our last step before cooking is applying an egg wash to the pretzel. Just brush each pretzel and notice how the dough becomes glossy.
We should also sprinkle our pretzels abundantly with coarse or sea salt. Alternatively, we can apply the melted butter to the pretzels before baking or right after baking.
Bake the Pretzels
Now it’s time to put the pretzels into the preheated oven.
We need to bake them for 12 minutes at 450°F (230°C).
They will be ready when they turn a dark color with slight cracks on their surface. Of course, their smell should be delicious.
After baking, they should be lightly crispy but soft and tender inside.
Now I usually add a little butter to the hot pretzels to make them glossy and soft.
Try not to eat the pretzels immediately after baking.
Mistakes To Avoid
Too Hot Water
Hot water destroys the yeast within several minutes. In such a case, the yeast won’t foam and release carbon dioxide. For this reason, we need to use water not warmer than 110°F/43°C.
Too Much Flour
When the dough is a bit sticky, we should try resisting the temptation of putting too much flour in. It makes pretzels hard and dry.
Too Long Boiling Time
It’s important to know the correct boiling time for soft pretzels. Overboiled pretzels have an unpleasant baking soda flavor.
No Baking Soda Bath
If we don’t boil pretzels in the baking soda bath, we’ll receive bread pretzels rather than chewy and flavorful ones.
Underdeveloped Dough
If we haven’t stretched the dough properly while boiling, our pretzels would puff oddly in the oven.
Ways to Change It Up
Cinnamon Sugar Pretzels
We skip the coarse salt and coat baked pretzels with the mixture of cinnamon and sugar instead. It tastes great with coffee.
Cheddar-Jalapeño Pretzels
We add finely shredded cheddar cheese and jalapeño slices into the dough.
Garlic-Parmesan Pretzels
We coat our baked pretzels with a mixture of garlic-butter, Parmesan, and chopped parsley.
How To Store and Serve
Our soft pretzels taste best while they are warm on the day of cooking. I enjoy them best with mustard or cheese sauce. If you prefer plain pretzels, then a little bit of melted butter will suffice.
At room temperature, pretzels will stay fresh and tasty for 2 days in an airtight container. We can reheat it for 5 minutes in the oven at 350°F (180°C).
If we store pretzels in the refrigerator, they may remain fresh for up to 5 days. However, in such a case, they may become a bit harder.
We can also store them in the freezer for 2 months. I usually wrap each pretzel separately and reheat it in the oven until hot.
Anyway, I believe the most delicious variant is to eat them immediately after cooking,g while the pretzels are warm and fragrant.
Hopefully, these soft pretzels have become one of your kitchen favorites.