Easy Keto Peanut Butter Pie with Chocolate Cookie Crust
I’ve baked many keto pies over the years, but this keto peanut butter pie is one of those desserts that surprises everyone every time. It is creamy, fluffy, rich, deliciously peanut-buttery and topped with a chocolate cookie crust that tastes dangerously similar to the real thing. Even my non-low-carb friends couldn’t resist getting seconds and had no idea they were eating a keto dessert.
This was one of the first recipes I made last year when I found myself needing a dessert that I could prepare ahead of time without turning my kitchen upside down. As a dessert, it is indulgent and doesn’t need an entire day to bake since most of the process takes place in the refrigerator. Not to mention, this combination of cold peanut butter filling and crispy chocolate crust is just so yummy.
And the thing I love most about it? It tastes like classic cream peanut butter pie, and, believe me, I am going to teach you how to make it yourself.
Ingredients List
For the Chocolate Keto Pie Crust
- 1 ¼ cups almond flour (125g)
- 3 tbsp coconut flour (24g)
- ¼ cup cacao powder or cacao blend (25g)
If you use cocoa powder, please use the unsweetened variety for a more pronounced chocolate flavour.
- ½ tsp baking powder (2g)
- ½ tsp xanthan gum (2g)
Xanthan gum makes the crust hold together well and gives it a cookie-like texture.
- ¼ tsp salt (1g)
- 4 tbsp cold butter (56g), cubed
- 1 tsp vanilla extract (5g)
For the Peanut Butter Filling
- ⅔ cup sugar-free powdered sweetener (130g)
- ¾ cup natural peanut butter (190g)
- 6 oz cream cheese (170g), softened
- ¾ cup heavy whipping cream (180ml)
Important note: Use pure peanut butter without any added sugars. The peanut butter that will contain sugar in the jar will affect the flavour and the carb count.
For Whipped Cream
- 1 cup heavy whipping cream (240ml)
- 2 tbsp powdered sweetener (24g)
- 1 tsp vanilla extract (5g)
Optional: Toppings
- Sugar-free chocolate drizzles
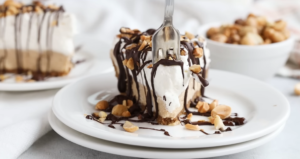
- Crushed peanuts
Crushed peanuts go on top of this pie because it adds an extra crunch to it and make it clear that it is a peanut butter pie.
Make Your Chocolate Keto Pie Crust
First, heat your oven to 350°F (175°C) and lightly grease a pie dish.
Mix almond flour, coconut flour, cacao powder, baking powder, xanthan gum, and salt in a food processor. Process everything for a couple of seconds to get a homogeneous mixture.
When the dry ingredients are thoroughly mixed, add cold cubed butter and vanilla extract. Mix until the dough resembles chocolate cookie crumbs. When pressed between fingers, it should hold together without crumbling.
The smell right now is amazing – cocoa, vanilla, and buttery almond flour in one. It honestly smells like an Oreo filling.
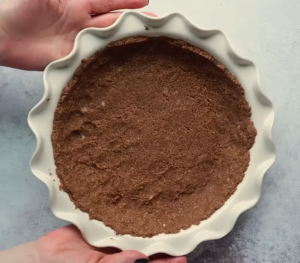
Press the crust dough evenly to cover the pie pan, making sure to press the crust up the sides of the dish. Bake for about 9 minutes or until the crust has set.
Let the crust cool completely before putting the peanut butter filling in.
Pro tip: When I made this crust the first time, I put the filling when it was still slightly warm since I was impatient. BIG MISTAKE! The peanut butter filling got too soft. Now, I always wait until the crust is completely cool before assembling the pie.
Make Your Peanut Butter Pie Filling
Place sugar-free powdered sweetener, peanut butter, and softened cream cheese in a mixing bowl.
Whisk all of the ingredients together until the mixture turns creamy and smoother.
The result should be smooth and creamy with no clumps. If the ream of cheese is cold, you’ll have to work for quite some time to make it smoother.
Pro tip: Room temperature cream cheese works better here and saves you from having to overwork the mixture.
Fold Heavy Whipped Cream into Peanut Butter Filling
In another bowl, pour the heavy whipping cream and whisk it with an electric mixer until stiff peaks form.
It’s ready when the whisk leaves marks on the cream’s surface. Texture should be light and fluffy.
The sound will change from splashing around to being much quieter.
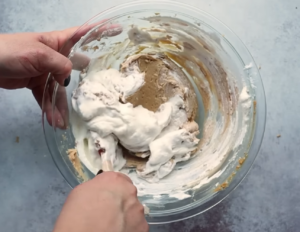
Start by mixing half of the whipped cream with your peanut butter filling. Then, gently fold in the rest of the whipped cream until no white streaks remain in the mixture.
The result is a creamy filling with the texture of peanut butter mousse.
Pro tip: Be careful about the texture; otherwise, you’ll end up destroying it when folding it in. Overmixing results in the loss of air, which will make the mixture dense.
Assemble Your Pie
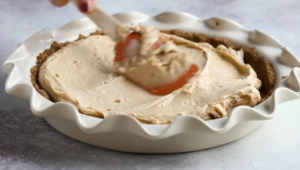
Put the cooled crust in your work area. Using a spatula, transfer the peanut butter filling to the prepared crust and spread it evenly.
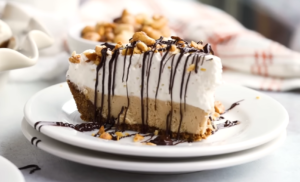
At this point, you should see how amazingly beautiful it looks with its creamy and thick filling on top of a chocolate crust.
This contrast of light-colored creamy filling and brown crust gives this pie the most amazing texture that is hard to describe.
Pro tip: Do NOT put the filling when the crust is still warm because it melts.
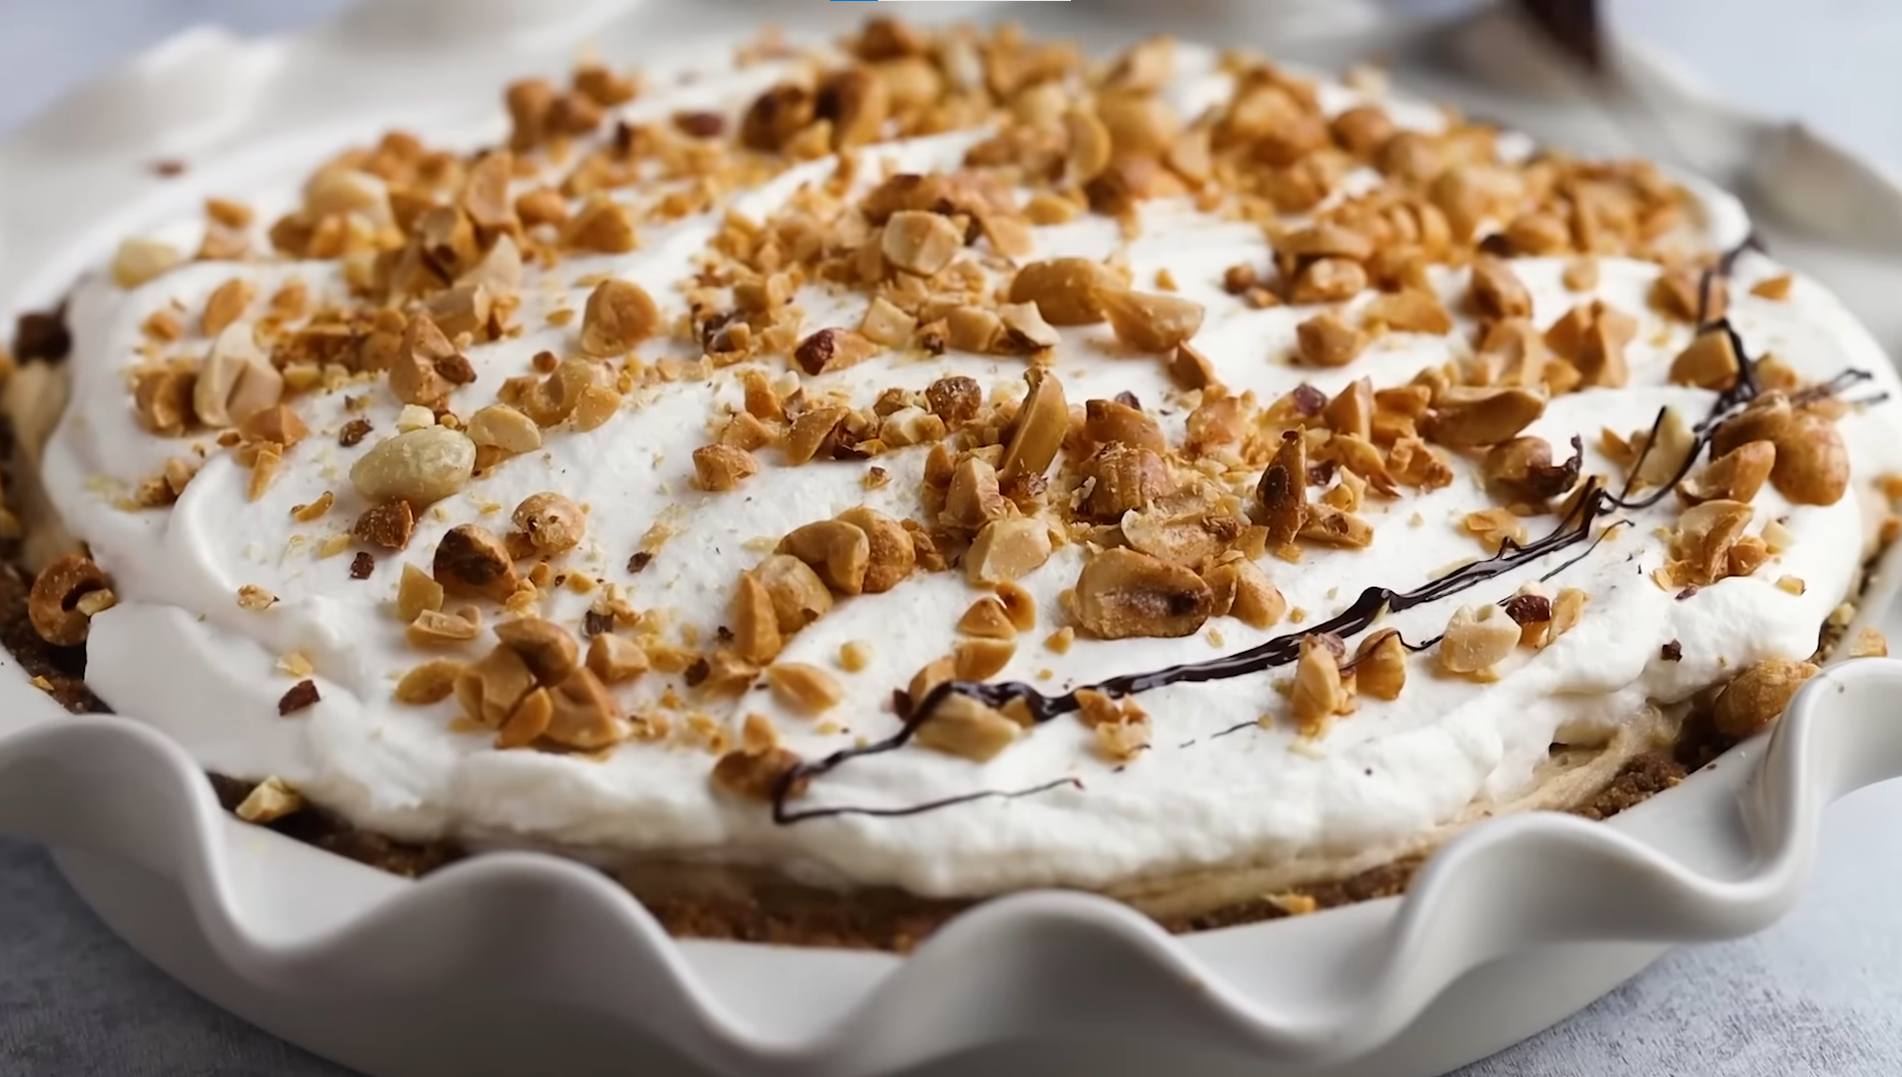
Top Your Pie With Whipped Cream
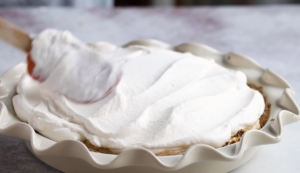
Prepare another bowl with heavy whipping cream and add a tablespoon of sweetener. Whisk until stiff peaks form.
Gently spread the cream over the filling.
It’s okay if your whipped cream has some imperfections. Personally, I like rustic-looking pies; therefore, I never try to achieve perfection. In fact, this topping is entirely optional, but I like to add it to balance the rich flavour of the filling.
Cold vanilla whipped cream tastes great on top of the salty peanut butter filling.
Also, feel free to add sugar-free drizzles of chocolate over the cream and crushed peanuts on top.
Pro tip: Cool down your bowl for about 10 minutes before whisking the cream.
Refrigerate to Allow Pie to Set
When your pie is assembled, it’s time to refrigerate it. Put it in the refrigerator and let it sit for at least 2 hours.
By doing this, you’ll allow your filling to set as well as improve the texture of your crust. This is the moment when everything comes together.
I personally love preparing this pie in advance, preferably the night before. The taste gets even better!
After chilling the pie, it should become cool and creamy, whereas the crust remains crunchy and cookie-like.

Mistakes to avoid
Putting the filling while the crust is warm
That will soften the filling and ruin the pie.
Overmixing the filling
Don’t mix your peanut butter filling when adding whipped cream because it will deflate.
Using sweetened peanut butter
Be sure to check the labels for hidden sugars and other fillers.
Not whisking the cream enough
This is crucial for the correct setting of the pie.
Chill it before serving.
If you slice your pie right away, it won’t look very appetising due to the lack of time.
Change This Recipe to Make It Your Own
Adding Chocolate Ganache Layer
Before adding the filling, cover the crust with sugar-free chocolate ganache to create a Reese’s effect.
Swapping Peanut Butter for Almond Butter
If you love almond flavour and don’t mind a slightly bitter taste, you can replace peanut butter with almond butter.
Use Espresso Powder for Intense Flavour
This powder will enhance the chocolate taste without making the pie taste like coffee.
Storage and Serving Instructions
This pie will keep its freshness in the refrigerator for up to 5 days when it is covered properly.
However, you can also freeze this pie in individual servings for up to 2 months. To do that, wrap each slice in plastic wrap and then place it in an airtight container.
Personally, I think it tastes better when it is served cold. So, put it in the refrigerator before cutting.
For holiday parties, add your drizzles and toppings right before serving to make it visually appealing.
And that is all! I just can’t stop thinking about how yummy this pie is. Every bite is delicious with a rich and creamy peanut butter filling.
So, if you serve this pie at a party, don’t tell guests that it’s keto at the beginning of the party.