Thick Oreo Cookies & Cream Milkshake Recipe – Rich, Creamy, and Even More Enjoyable than Any Cafe Version
There are times when one is craving some dessert but doesn’t want to spend a whole hour in the kitchen or preheat the oven. This is when I always use my Thick Oreo Cookies & Cream Milkshake Recipe. It’s very rich, very creamy, full of crushed Oreos, and tastes better than anything from a fancy dessert café.
When I made an Oreo milkshake for the first time, I used an excessive amount of milk because I was sure that it would help blend everything much faster. Yes, it did speed up the blending process, but the result wasn’t as creamy and thick as I wanted it to be. That’s why I know that to get this texture,e one should use less milk and lots of ice cream.
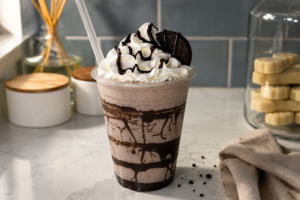
After watching the recipe video and trying the recipe on my own, I discovered a couple of tricks that can improve the final result significantly. Whether it’s decorating the glass with chocolate syrup or making sure there are tiny bits of Oreo cookies inside, all the details are important.
If you’re longing for a thick, rich, chocolatey milkshake with lots of cookies inside and topped with whipped cream, then you should check this recipe out.
What You’ll Need
For the Milkshake
- 6 Oreo cookies (72 g)
Classical Oreo cookies give you that famous cookies-and-cream taste. With double-stuffing Oreo, you will get an even richer milkshake.
- 3 cups vanilla ice cream (about 450 g)
For the best taste, use high-quality vanilla ice cream that has a lot of butterfat to give it the creamiest texture.
- ½ cup whole milk (120 ml / 122 g)
Whole milk blends all the ingredients without thinning your milkshake and making it watery.
- 2 tablespoons chocolate syrup (30 ml)
This ingredient is used both inside the serving glass and as a topping.
For Topping
- Whipped cream (about ½ cup / 60 g)
If you want your milkshake to have a fluffy top, add fresh whipped cream.
- 1 Oreo cookie
- Perfect garnishing.
- Extra chocolate syrup
- For topping the whipped cream.
Prepare the Serving Glass
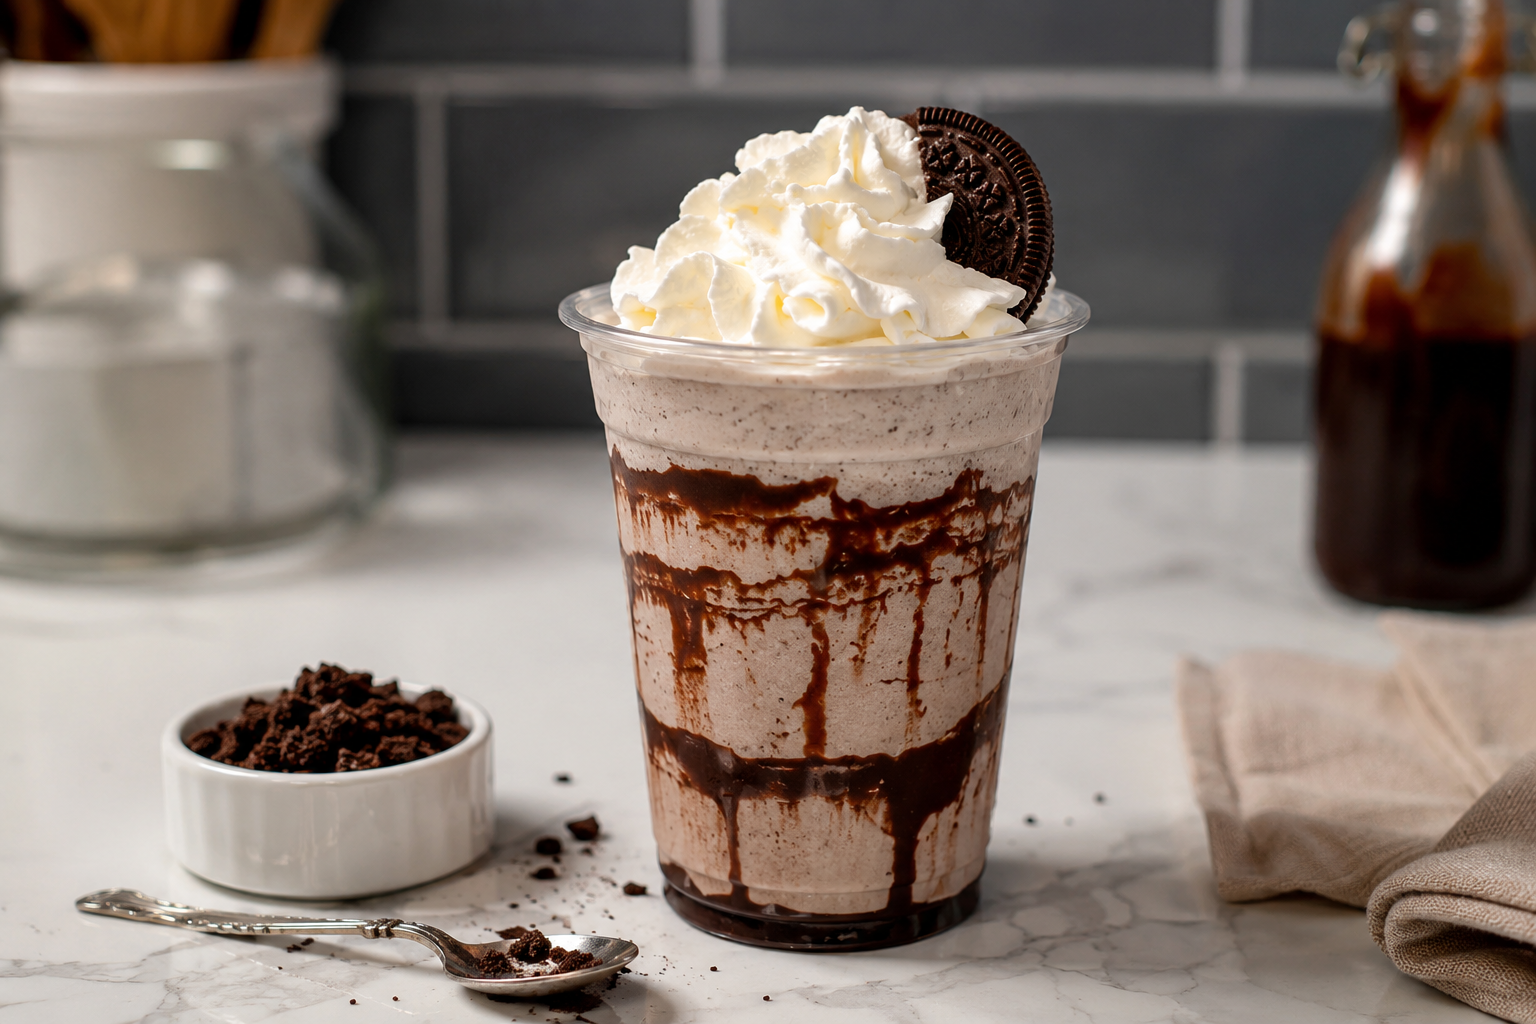
Before I start blending my Oreo milkshake, I decorate the glass. I pour the chocolate syrup on the sides, slowly spinning the glass. This process only takes a minute and instantly makes your milkshake look like it was made by a professional.
As the chocolate syrup flows down the glass walls, it forms delicious chocolate stripes that remain visible when you pour the milkshake in. Every sip will have an extra portion of chocolate, making your milkshake more delicious.
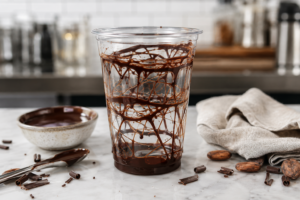
Pro Tip: Put the decorated glass in the freezer to keep the milkshake from melting faster.
Blend the Ingredients
Put the Oreo cookies into your blender, followed by vanilla ice cream and milk.
Blend the ingredients on medium speed until you get a thick, creamy, and smooth milkshake with tiny black Oreo pieces.
One of the most important lessons I’ve learned from making an Oreo milkshake is not to over-blend it. The first time, I continued blending until I got a completely smooth milkshake, and instead of getting a perfect result, I ended up with a thinner milkshake. Don’t make the same mistake and stop blending as soon as you get a homogeneous texture.
Once it’s done, the milkshake should flow slowly out of the blender without being poured like a usual milkshake. That’s exactly the texture you need.
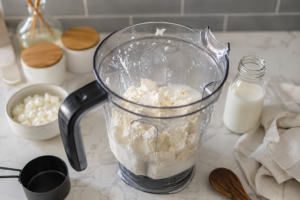
Pro Tip: In case the blending process seems difficult for your blender, stop and stir instead of adding extra milk. Often, this is all it needs to continue blending and make your milkshake thick.
Pour and Decorate
Remove the chilled glass from the freezer and carefully pour the thick Oreo milkshake into it.
Notice how the chocolate syrup beautifully sticks to the sides of the glass and how the creamy milkshake fills all the corners of it. The contrast of the white vanilla base and the chocolate stripes looks really amazing.
Decorate your milkshake with a generous amount of whipped cream and chocolate syrup, and finish with a whole Oreo cookie on top.
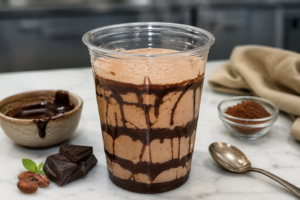
Finish with the Perfect Toppings
The toppings are the easiest part of the recipe, but the ones that can make your Thick Oreo Cookies & Cream Milkshake Recipe look like a dessert from an ice cream shop. I always decorate my milkshake with a tall swirl of whipped cream, a generous drizzle of chocolate syrup, and a whole Oreo cookie on top. Sometimes I crush extra cookies and put them on top of the whipped cream for extra crunch.
The contrast of the fluffy whipped cream, silky chocolate drizzle,e and crunchy cookie will make every sip unique. The first spoon is always the best, as you get all the elements together.
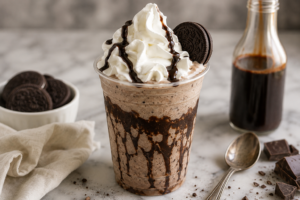
Pro Tip: Cool the whipped cream in the refrigerator before you use it. Cold whipped cream will retain its form longer than at room temperature.
Adjust the Thickness
There are a lot of things I love about homemade milkshakes, but the ability to easily adjust them is the most important one for me. In case you want a thick milkshake that you can eat with a spoon, add an additional scoop of vanilla ice cream and blend it for a few seconds. In case you like to drink your Oreo milkshake through a straw, add milk one tablespoon at a time until you reach the desired consistency.
Always make your milkshake thicker than you expect because it will melt anyway due to the softening of the ice cream.
Texture should be smooth, creamy, and rich without having an icy consistency. When you open the lid of your blender, you’ll see that the milkshake sticks to the walls of the blender instead of running off.
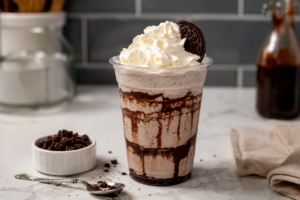
Pro Tip: Never use ice cubes to cool your milkshake. They will not only cool down the milkshake but also dilute the taste and make it icy instead of creamy.
Mistakes to Avoid
Too Much Milk
This is the most common mistake made by people. It occurs due to the belief that the blender doesn’t work properly. To avoid it, stop the blender, mix everything with a spatula. In most cases, it’s enough.
Over-blending the Milkshake
Over-blending heats the ingredients and leads to the melting of ice cream. As a result, you get a runny milkshake. Stop blending as soon as everything is mixed.
Soft or Melted Ice Cream
In case the ice cream is partially melted, your milkshake will not be thick. Defrost the ice cream for only two to three minutes before mixing.
Skipping a Chilled Serving Glass
Due to the heating of the mixture in a warm serving glass, you get the melted milkshake. By chilling the glass beforehand, you keep every sip thick and cold.
Not Adding the Garnish
Whipped cream, chocolate drizzle, and Oreo cookies are not just decorative elements but increase texture and taste,e and make the milkshake more unique.
Ways to Change It Up
Double Chocolate Oreo Milkshake
For chocolate fans, use chocolate ice cream instead of vanilla ice cream and add one tablespoon of cocoa powder. It gives an even richer chocolate milkshake.
Peanut Butter Oreo Milkshake
By blending two tablespoons (32 g) of creamy peanut butter, you create a nutty taste, which is amazing in combination with chocolate cookies.
Cookies and Cream Coffee Shake
Mix half a teaspoon of instant espresso powder or a cooled shot of espresso. It intensifies the chocolate taste without making the milkshake overpowering with coffee.
How to Store and Serve
Of course, this milkshake tastes the best immediately after preparation. At this moment, it is the coldest, thickest, and creamiest.
To keep leftovers in the fridge, store them in a tight container for up to 24 hours. Stir before serving carefully or re-blend for several seconds since slight separation can occur.
To preserve the milkshake for a longer period, freeze it in a suitable container for up to one month. Thaw it for 15-20 minutes before blending.
I like serving the milkshake along with brownies, cookies, or even chocolate cake. It can become an excellent dessert for birthday parties, movie nights, summer barbecue, etc, and other events.
Frequently Asked Questions
How do I make my Oreo milkshake thicker?
Reduce the amount of milk and increase the amount of ice cream. In this way, starting with half a cup of milk, you control the consistency much better. To keep your milkshake thick, cool your serving glass.
Is there any substitute for vanilla ice cream?
Of course, there are some substitutes – cookies and cream, chocolate, cheesecake ice cream,s etc. Each of them brings a specific taste but keeps the milkshake creamy.
Is it possible to prepare this milkshake in advance?
Any milkshake tastes best right after preparation. In case you make it in advance, store it in the fridge for up to one day and re-blend before serving.
Can I use low-fat milk?
It’s possible, but whole milk gives the milkshake a richer and creamier taste. Low-fat milk results in a thinner milkshake.
How can I make it richer?
Feel free to add chocolate chips, brownies, cookie butter, caramel sauce, or additional crushed Oreos to make your dessert even richer.
Final Thoughts
When I crave something sweet but want to spend minimal time in the kitchen, this Thick Oreo Cookies & Cream Milkshake Recipe is one of the first things I prepare. It is extremely creamy and full of the taste of chocolate cookies, and takes me several minutes and only a few ingredients that I have in my kitchen.
I hope that this recipe will become one of your desserts, which you return to often. Whether you are preparing it for your family, friend, or just treating yourself after a hard day, every thick and creamy sip is worth it. Enjoy!