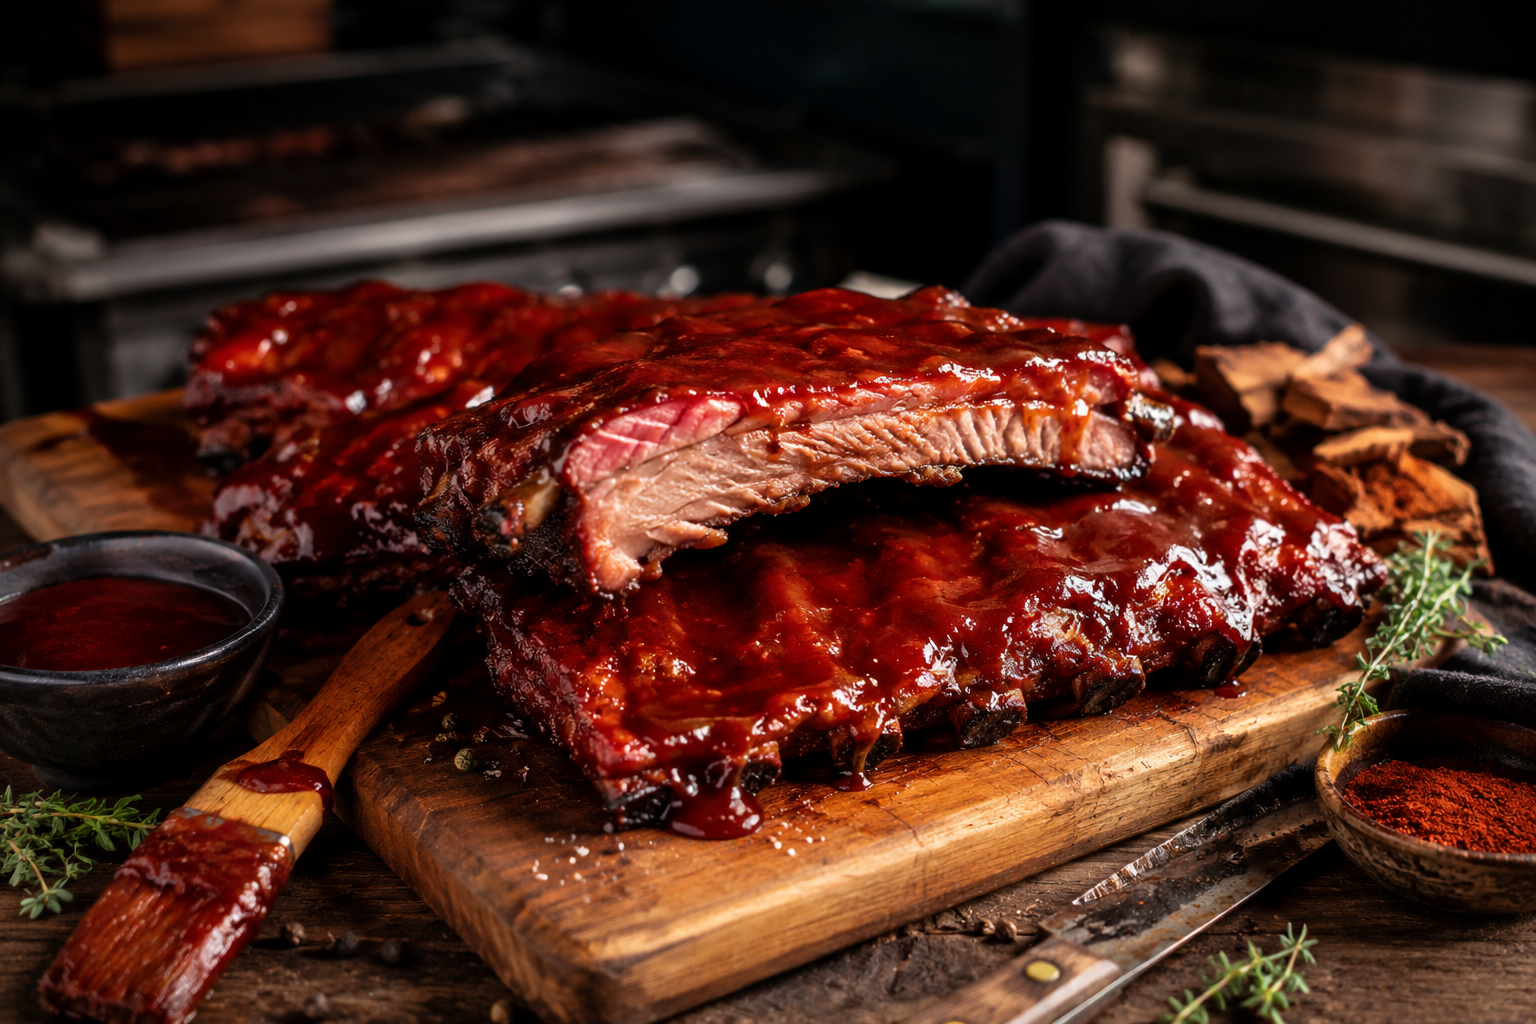
Tender Oven-Baked Ribs Recipe – Fall-Off-The-Bone, Juicy, and Full of Flavors
Some recipes instantly fill your house with coziness, and this Tender Oven-Baked Ribs Recipe is among them. If you are looking for the juiciest, most tender, and well-seasoned ribs that can slide off the bone, this recipe is for you. And the good news is that you don’t need a smoker, a grill, or other fancy stuff. All you need is an oven.
I started cooking oven-baked ribs years ago when I wanted to prepare barbecue ribs in the middle of winter. Spending time outside with a smoker in those conditions wasn’t very tempting for me, so I decided to experiment with a low-and-slow oven cooking technique. It took me some time and mistakes, but eventually, I found out that patience was the key. Just a couple of hours in the oven makes your tough ribs extremely tender.
My first attempt to make ribs included very high temperatures in the oven, thinking that this would speed up the process. As a result, the ribs’ outside was dry and tough. From that moment, I have been cooking ribs low and slow.
And now it’s time to introduce my juicy and tender oven-baked ribs covered with a sticky barbecue glaze that is as delicious as any ribs from a restaurant.
Ingredients
For the Ribs
- 2 racks of pork baby back ribs (4-5 lbs /1.8- 2.3 kgg total)
- 2 tablespoons yellow mustard (30g)
Mustard is used as a binding agent and makes ribs better covered with seasonings. Do not worry, it’s barely noticeable in the finished product.
For the Dry Rub
- 1/4 cup brown sugar (50g)
- 2 tablespoons paprika (14g)
- 1 tablespoon garlic powder (9g)
- 1 tablespoon onion powder (8g)
- 2 teaspoons kosher salt (12g)
- 2 teaspoons black pepper (4g)
- 1 teaspoon chili powder (2g)
- 1 teaspoon smoked paprika (2g)
- 1 teaspoon cayenne pepper (optional, 2g)
Smoked paprika gives a slight smoky flavor that imitates the barbecue cooking outdoors.
For Finishing
- 1 cup of barbecue sauce (240ml)
It can be sweet, smoky, spicy, or tangy. Whatever you prefer is fine.
How to Prepare Ribs
The first step is the proper preparation of the ribs. Turn the ribs upside down and notice the thin and shiny membrane running along the back side.
Slip the edge of a butter knife under the membrane and loosen it. Then grab the membrane with a paper towel and pull.
Either way, this membrane will tear off easily.
Removing the membrane is a simple way to make ribs more tender.
After that, pat your ribs with paper towels to dry them.
They shouldn’t be wet, but the surface should be slightly sticky.
Pro Tip: Do not skip the removal of the membrane. It’s the easiest way to make ribs more tender.
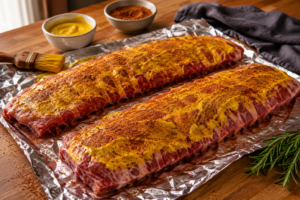
Season Your Ribs Generously
Combine brown sugar, paprika, garlic powder, onion powder, salt, pepper, chili powder, smoked paprika, and cayenne in a bowl.
The seasoning mixture should have a rich smoky and slightly spicy smell.
Cover both sides of the ribs with mustard.
Sprinkle the prepared seasoning over your ribs generously.
Press the seasoning into the ribs with your hands.
At this point, your ribs should be covered with a rich dark brown coating.
I recommend spending an extra minute on this stage. Uneven seasoning means uneven flavor in the finished dish.

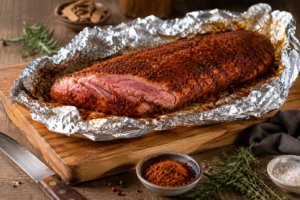
Wrap and Arrange the Ribs for Baking
Arrange a baking sheet or a roasting pan with the help of aluminum foil.
Place a wire rack into the foil pan if you have it. It helps the ribs to cook evenly.
Arrange the ribs into the pan and wrap them tightly.
We need to prepare a tightly packed package to prevent moisture from evaporating.
As the ribs will be cooking, the meat will be releasing moisture and forming a steaming effect.
Pro Tip: I recommend double wrapping of ribs if the foil is too thin. Evaporated moisture means tough meat.
Low-And-Slow Cooking
Preheat your oven to 275°F (135°C).
Place the tightly packed ribs into the oven and bake them for approximately 2.5-3.5 hours.
Of course, the cooking time will vary depending on the thickness of your ribs.
But this is the stage where magic happens.
The meat is getting tender thanks to the slow breakdown of collagen into gelatin.
After 2 hours of cooking, your kitchen will be filled with an incredible smell. You will notice a rich and aromatic scent of spices, roasted pork, and smoky paprika.
When ribs are ready, the meat will pull back from the ends of the ribs.
If you lift the rack with tongs, the rack should be able to bend.
Pro Tip: Do not be tempted to open the oven door frequently. This will increase the cooking time.
Test the Tenderness of Your Ribs
Remove the ribs from the oven and unwrap them slowly since the hot steam will be released.
You will notice the amazing smell right away. It is rich and aromatic.
Insert a toothpick between the ribs.
It should be inserted with minimal resistance.
It means that your ribs are ready for the finishing glazing.
If your ribs are still hard, wrap them and bake for 20-30 more minutes.
Patience pays off!
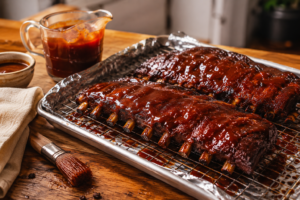
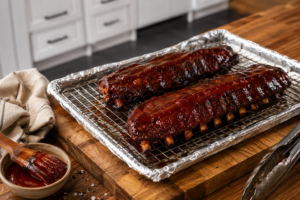
Brush With Barbecue Sauce
Arrange the ribs on the wire rack and brush the top generously with barbecue sauce.
Do not hesitate to cover the ribs completely.
The sauce is becoming glossy and developing flavor while it is cooking.
And the smell is even more powerful.
I apply two layers because I enjoy the coating of the ribs with the barbecue sauce.
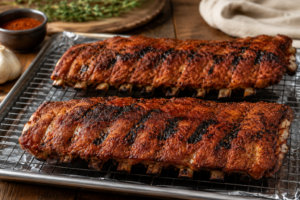
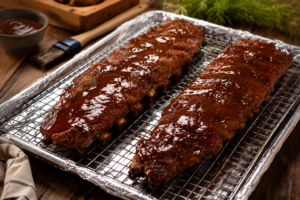
Caramelization of the Glaze
Preheat your oven to 425°F (220°C) or use the broiler function.
Place the ribs into the oven and cook for 5-10 minutes.
Watch your ribs carefully.
The glaze should be slightly bubbly and glossy.
The edges should be slightly darker, which will create pockets of concentrated flavor.
If you do everything correctly, your ribs should look lacquered.
The glaze should be sticking to the meat.
Pro Tip: Broiling takes place very quickly. Be careful since the barbecue sauce can burn very fast.
Let the Ribs Rest
Let your ribs rest for 10 minutes before serving.
It will help to redistribute the moisture in the meat.
Hot and tender ribs should be very fragile and difficult to slice.
After resting, they become much easier to slice and juicier.
Slice between the ribs using a sharp knife.
And you will see how easily they slice.
It’s exactly what you were striving for.
How to Serve the Ribs
Serve your ribs immediately while they are warm.
The meat should be tender and juicy.
You will notice the combination of the smoky spices, barbecue sauce, and pork flavor in each bite.
The moment I really enjoy is when I can pull the meat from the bones very easily.
It’s proof of successful cooking.
Mistakes To Avoid
Too High Cooking Temperature
Some people think that higher temperature means faster cooking.
However, ribs require low and slow cooking to break down their connective tissues properly.
Skipping the Removal of the Membrane
The membrane can become chewy and prevent seasoning from penetrating.
It requires only one minute.
Under-Seasoning
Ribs are thick slices of meat and require many seasonings.
Apply the dry rub generously.
Badly Wrapped Ribs
Loosely packed ribs will lose moisture and will not become tender.
Applying the Sauce Too Early
The barbecue sauce has a lot of sugar in it.
If you apply it at an early stage, ribs can burn before being fully cooked.
Apply the sauce near the end of the cooking process.
Different Variations
Sweet Honey Barbecue Ribs
Add 2 tablespoons (42g) of honey to your barbecue sauce to glaze your ribs. This will give your ribs a beautiful caramelized look.
Spicy Oven-Baked Ribs
Add more cayenne pepper and hot sauce to your barbecue glaze. These two ingredients create the perfect balance of meat and pork flavors.
Smoky Texas-Style Ribs
Use more smoked paprika and pepper rub. Skip sweet sauces.
Ways to Store and Serve
Refrigerator
Leftovers should be stored in an airtight container for up to 4 days.
Freezer
Your ribs can be frozen for up to 3 months.
Reheating
To keep them juicy, heat them covered in a 300°F (150°C) oven for a couple of minutes, adding some apple juice or water.
Ways to Serve
These ribs will go perfectly well with:
- Coleslaw
- Baked beans
- Mac and cheese
- Cornbread
- Potato salad
- Roasted vegetables. In my opinion, they are even better the second day when the flavors become richer.
Frequently Asked Questions
How do I know when oven-baked ribs are ready?
Meat should be pulled back from the bones, bend easily when lifted, and let the toothpick slide through with no resistance.
Can I make ribs ahead of time?
Yes. Cook them in advance, cool down, and glaze before serving.
What is the best temperature for baking ribs?
275°F (135°C) is the optimal temperature since it allows the gradual breakdown of connective tissue without making ribs dry.
Do ribs have to fall off the bone?
Not necessarily. Well-cooked ribs should be very tender, but still should hold well when lifting them.
Can I use spare ribs instead of baby back ribs?
Absolutely. They are bigger, and you should bake them for 30-60 minutes longer.
There is something incredibly satisfying in taking a tray of beautifully glazed ribs from the oven and admiring their tenderness. Every time Icook thise Tender Oven-Baked Ribs Recipe, I’m reminded that great barbecue isn’t necessarily associated with expensive devices – it’s simply about patience and the right dry rub.
I hope my ribs will occupy a permanent place in your collection of recipes. At least they occupy mine and always become the first to be eaten during gatherings with my friends or family.